Oprah Winfrey once said that “great communication begins with connection”. And although Oprah probably didn’t have a live chat solution in mind, it nicely portrays the main topic of this article.
One of the basis of building strong relations with your customers is being ready to solve their problems whenever they need you.
To achieve that, you need to create a connection between your brand and your customers. Show them that you’re always eager to answer questions, solve their problems, and just have a chat.
But how to do it?
By installing a live chat button on your website.
Communicate with visitors in real time
So, let’s start with the basics—
What is a live chat button?
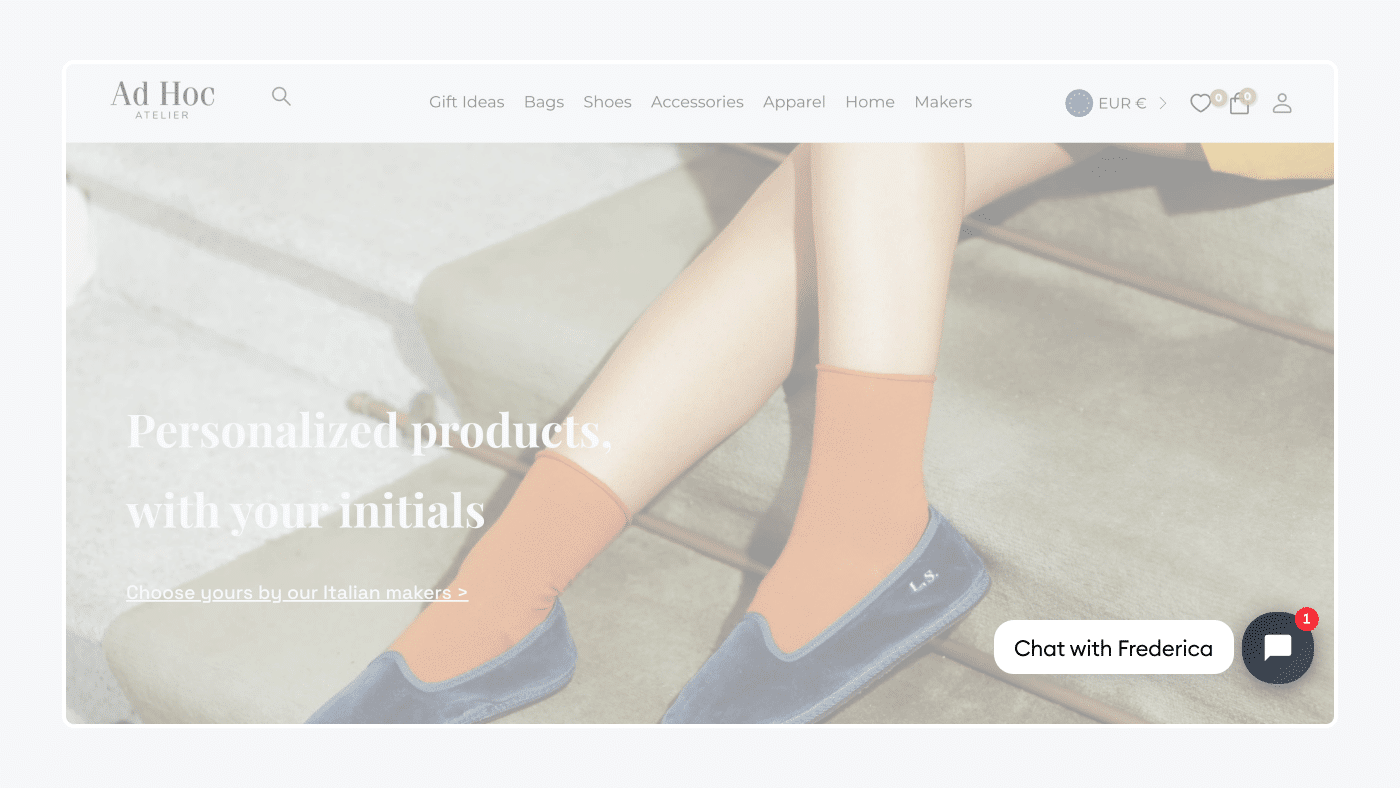
A live chat button is an icon on your website that allows visitors to communicate with your customer support team in real-time through a chat window. By pressing the chat now button, a visitor opens a chat window and is able to communicate with your customer service team right away.
Thanks to that, agents can quickly and effectively answer your visitors’ questions, solve their problems or share some helpful materials in more complex cases.
Usually, a live chat button looks like this:
Now—
Let’s discover what a live chat button can bring to your business.
Benefits of live chat button
Adding a live chat button to your website shows the visitors that you’re open to talk and ready to answer their queries. It helps you to build a strong and trustworthy brand and provide great customer service. But that’s not all. A live chat button can also help you improve customer engagement, provide high quality support, or even increase conversion rate!
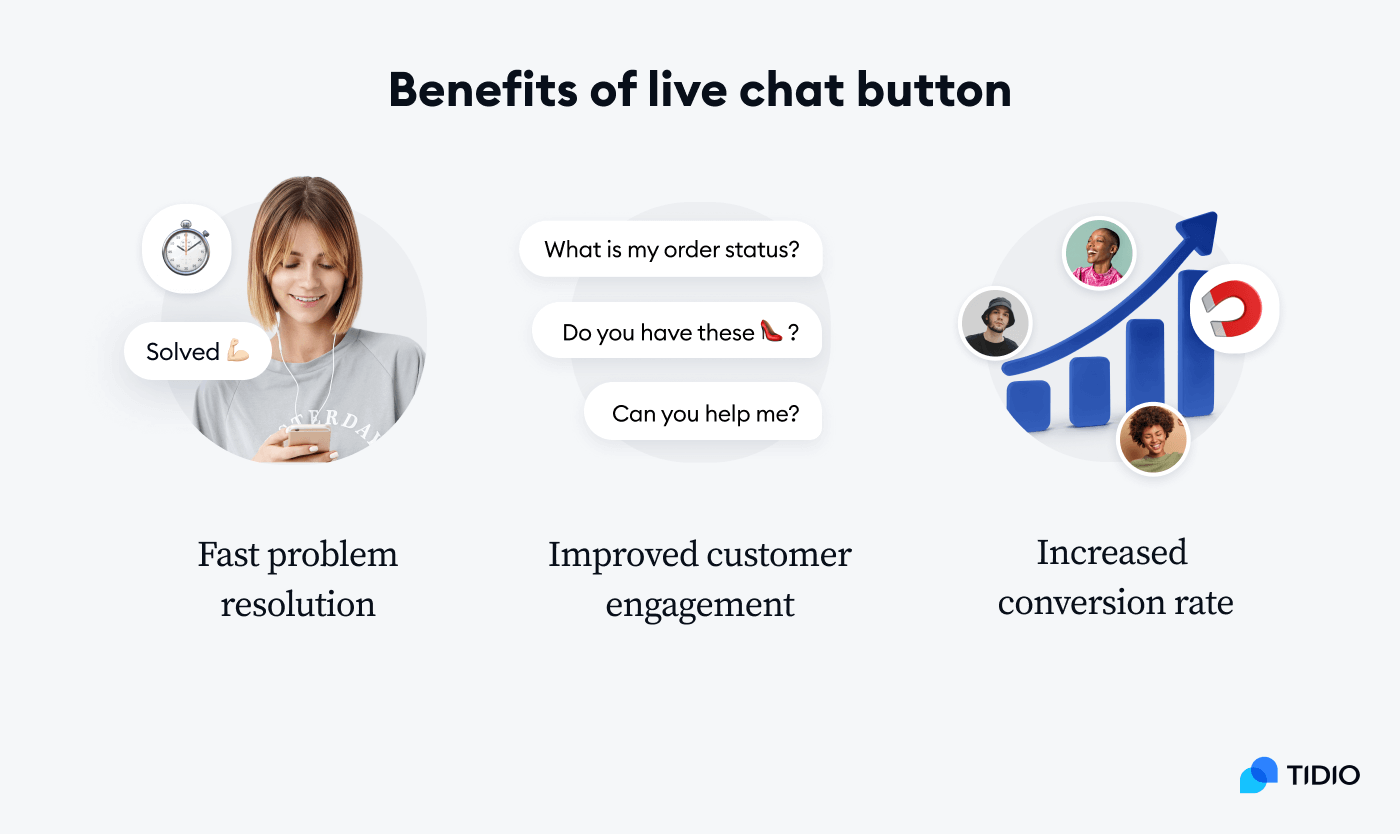
Faster problem resolution
By clicking on a chat button, your customers can easily connect to your support agents who can help them solve their problems instantly. What’s more, your agents can also assist lost visitors that can’t find specific products or information. Having in mind that the communication is happening in real-time, it shows shoppers that you act quickly, proactively, and care about high-quality support.
But how quickly can you support your visitors via live chat?
Although there are no specific standards for the industry, our live chat tool data shows that the average live chat response time is 1 minute and 35 seconds. This is a big leap in performance, especially when we compare these results with the median wait time for email which is usually counted in hours if not days.
Improved customer engagement
A live chat button can be a great ally in increasing your customers’ engagement. Thanks to this small chat widget, clients can contact your customer support team in a split second, so the agents get to know your visitors better and offer them tailored solutions. In fact, 79% of consumers say being able to engage with knowledgeable store associates is “important” or “very important”.
On top of that, live chat is just very popular and people like this solution. In fact, more than 41% of customers expect live chat on your website.
Increased conversion rate
A live chat button on your website can improve your sales and conversion rates. In fact, research conducted by Kayako showed that 79% of businesses reported that implementing live chat resulted in increased customer loyalty, sales and revenue.
This is because real-time support offered by live chat solutions help businesses instantly address concerns customers may have in their buying journey. After a successful live chat session, 38% of customers go ahead and make a purchase.
What’s more, Software Advice’s research revealed that website visitors and customers who are using live chat during their buying process tend to spend 60% more per purchase.
As you can see, this simple solution can bring quite a lot of benefits to your business.
But how to add a live chat button to a website?
It’s a super easy process that takes no more than 5 easy steps. Let’s go through them briefly.
Add a customized live chat button to your website
How to add a live chat button to your website?
First of all, if you’re worried that implementing live chat buttons requires coding—
The answer is no. You can embed a chat button to your site without writing a single line of code.
All you have to do is to copy a simple HTML or JavaScript code and paste in your ecommerce site or website integrations tab. Simple as that.
To make the whole “tutorial” part easier and consistent, we’ll be using Tidio as an example. Simply put, this is the tool we know the best and, by the way, it has 1,178 5-star reviews on G2.
But let’s focus on how to add a live chat button to your site.
So, starting from scratch—
Step 1: Choose live chat software and create your account
To add a live chat button to your website, start by choosing the best live chat software for your business and set up an account there. In most cases, the entry level version of these platforms is free or there’s a free trial version to test the tool.
In Tidio, the registration is super easy and intuitive. You can sign up using your email address, Facebook, or Wix, just to name a few.
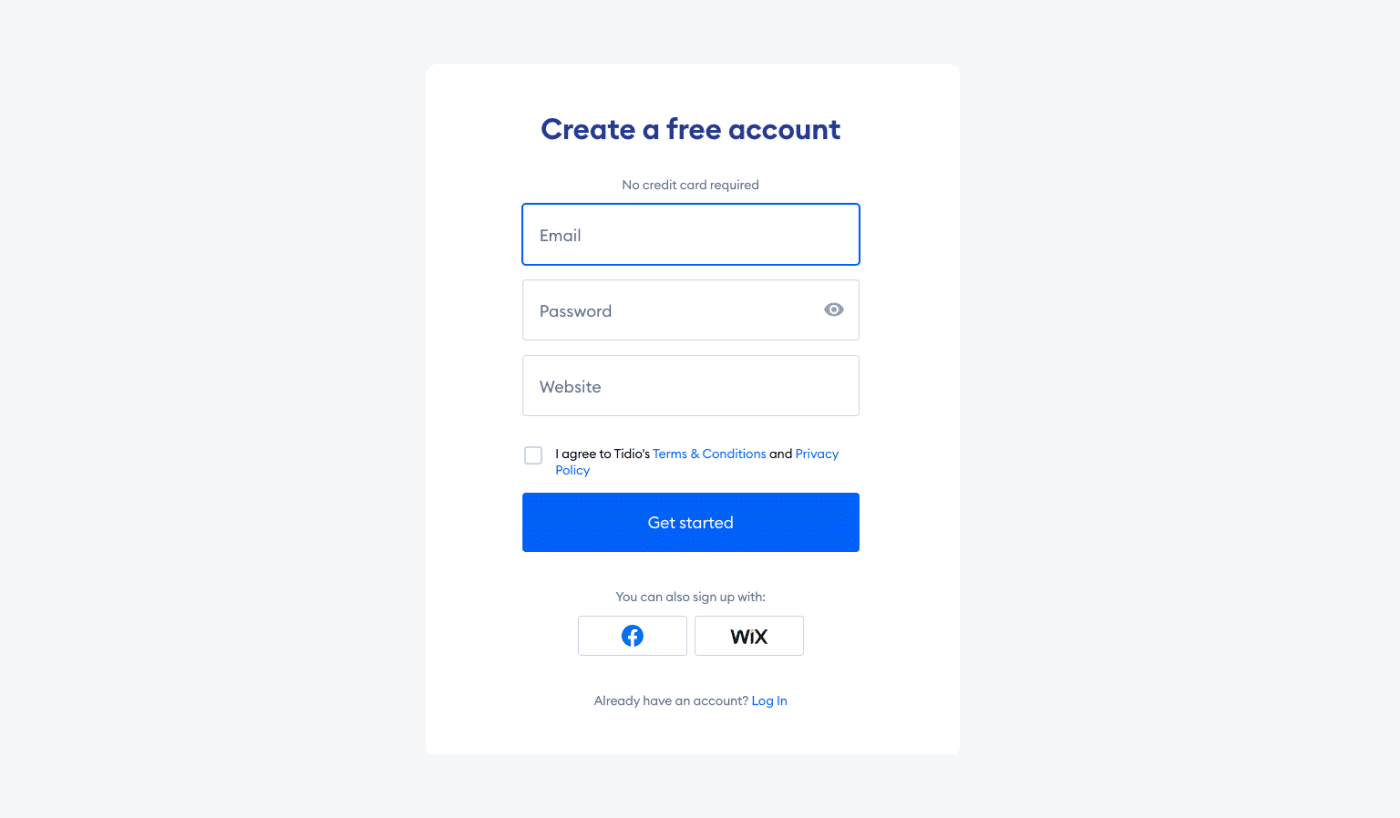
If you choose to register by email, all you need to do is type in your email address, create a password, and add your website address. Then, of course, click on the Get started button to finish off.
And voila! You’ve become a part of the Tidio family!
But it’s only the first step. Now, to be able to use a free live chat button on your website, you have to configure your chat widget.
Let’s find out how to do that.
Step 2: Configure your live chat button and widget
After setting up your account, you’ll be asked to add your name, avatar, pick a color of your chat widget, and select chat language. This is not a forever commitment as you can always edit everything about your chat button later in the widget settings.
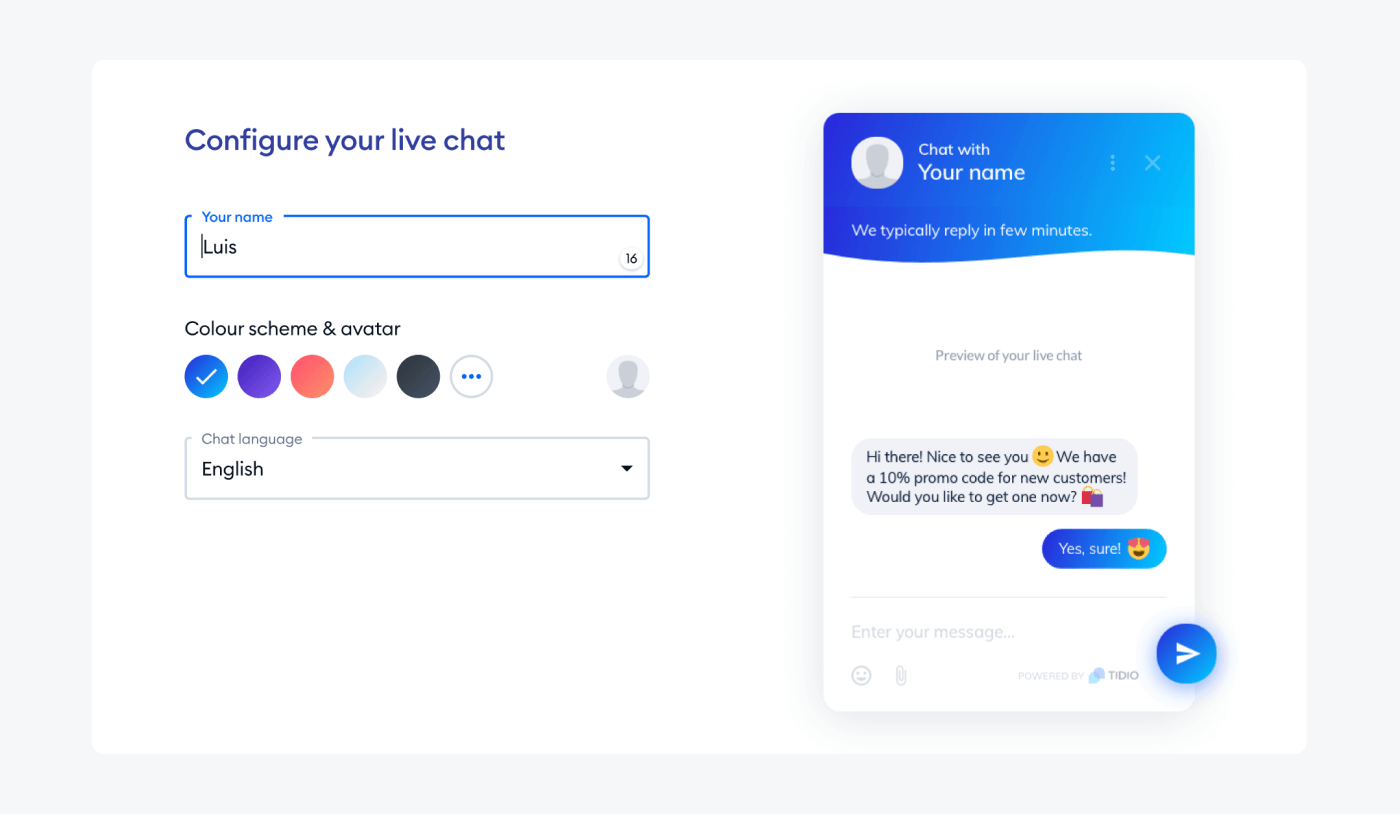
Of course, there are a lot more possibilities to customize your widget, but we’ll expand it further in a dedicated section.
Step 3: Add information about your company
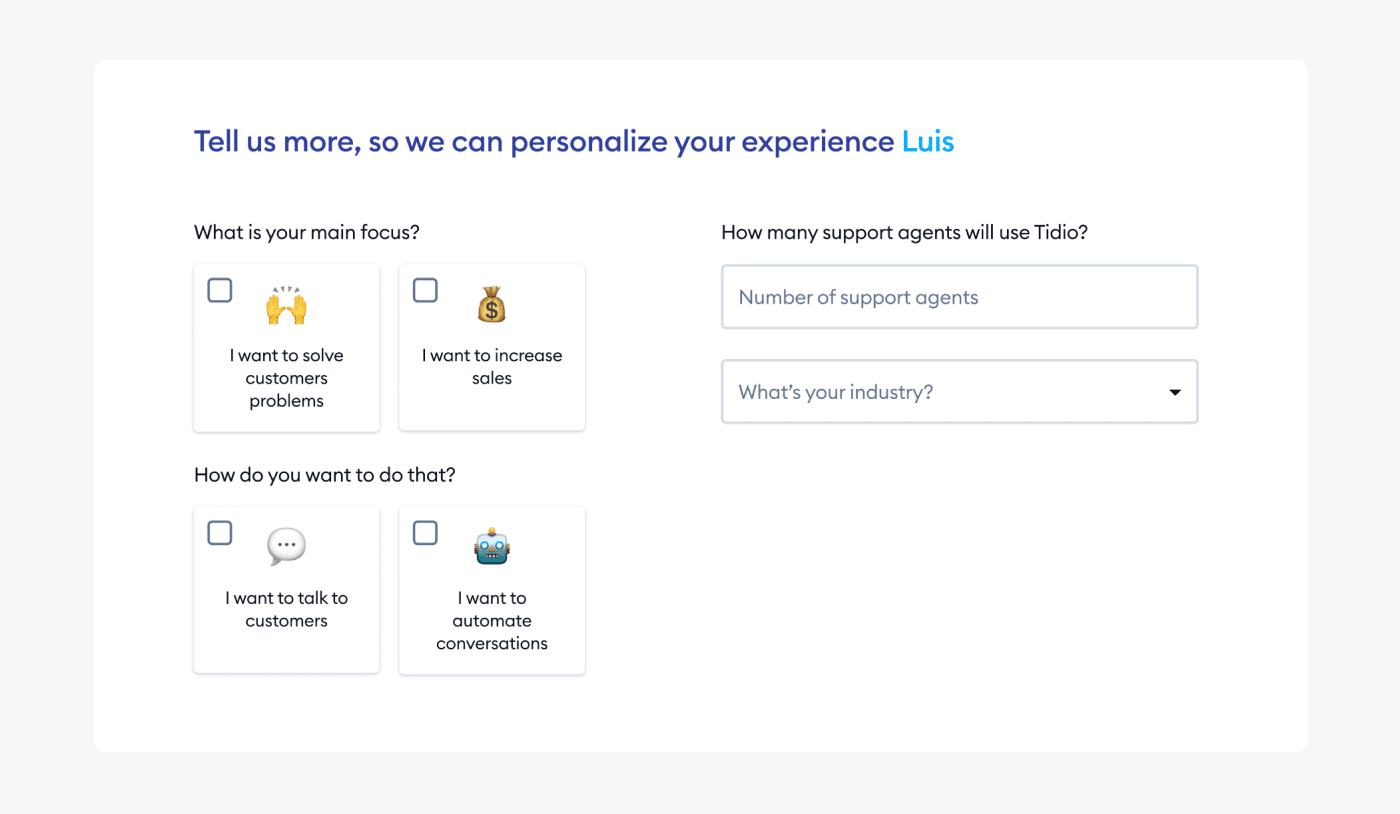
Next, you’ll be asked about what you want to achieve with Tidio (solve customers’ problems or increase sales) and how you want to do that. Also, we’ll ask you about how many of your support agents will use Tidio, the number of customers you served last month and the industry you operate in.
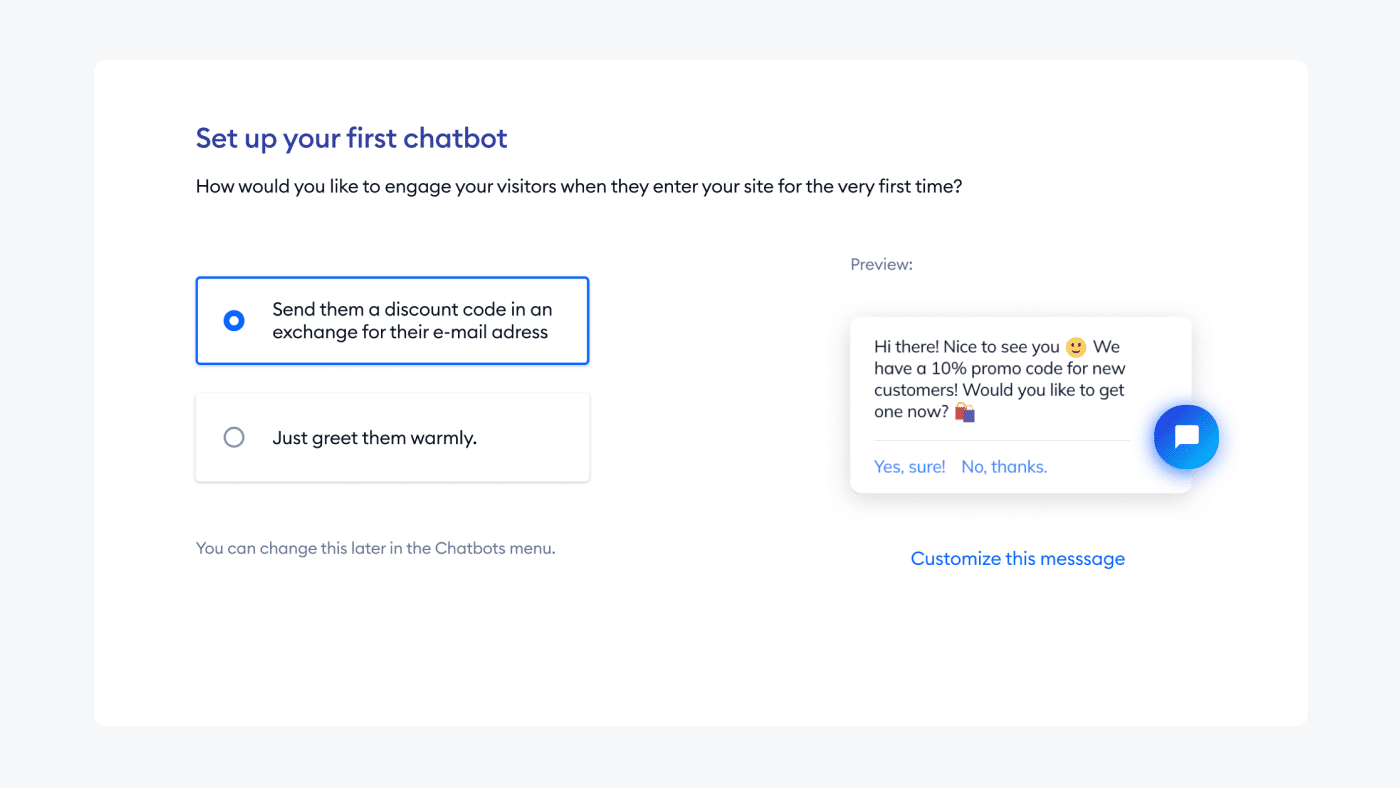
Step 4: Set up your first chatbot
Yes, I know that “setting up a chatbot” while talking about live chat may sound a little confusing. But, in reality, it’s not. In this step, the chatbot you’ll be asked to set up is a welcome message to your website visitors. This message is designed to engage these people when they visit your website for the first time. It can be done just by greeting them warmly or sending a special discount.
Step 5: Install a live chat button on your website
You have your live chat widget set up. But now, to be able to use the chat app, you need to install it on your website. If you’ve created your Tidio account with an email address, you can do it in two ways:
- Copy the JavaScript code and paste it in your website template source
- Send the instruction and code to your web developer
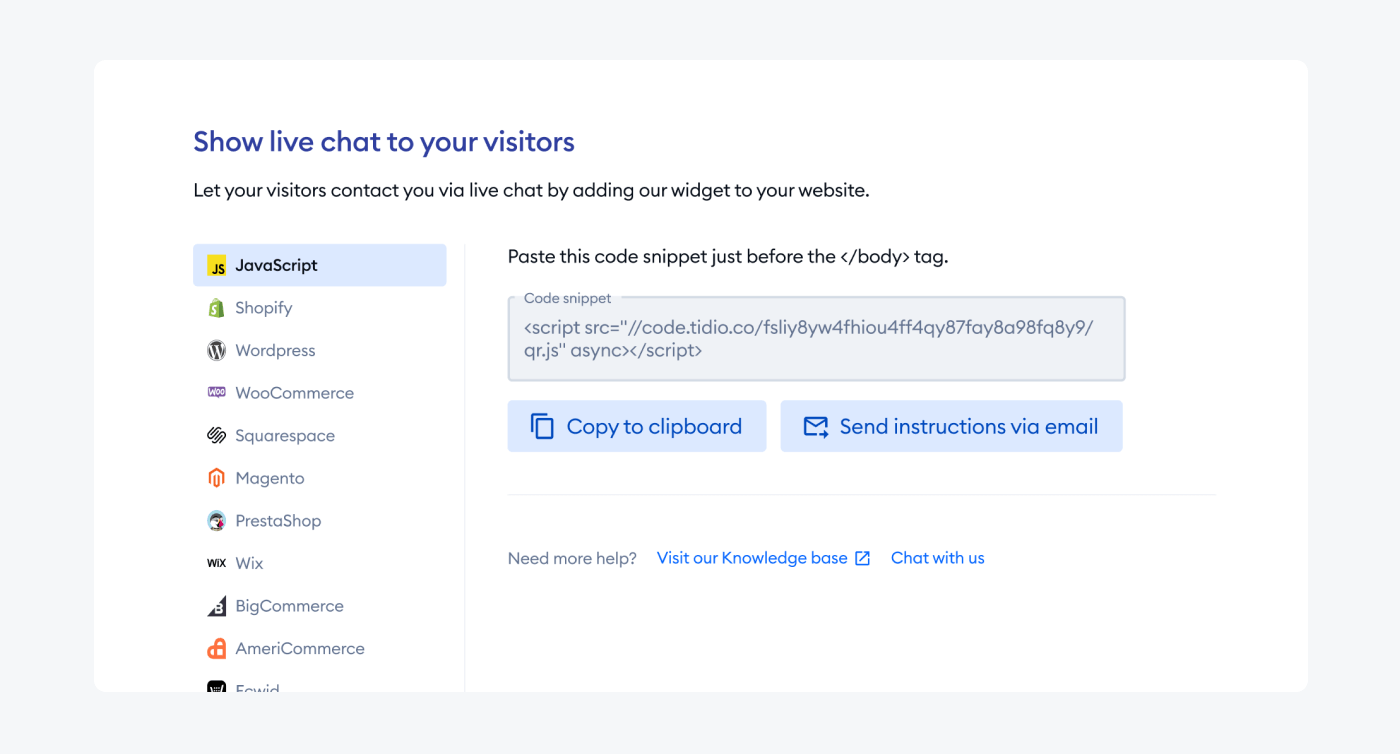
As the second option is all about typing in your developer’s email and clicking “Send”, let’s focus on the “Copy to clipboard” scenario.
In this step, you’ll get the JavaScript code to manually implement it to your website’s source. If it sounds complicated for you, don’t worry. It’s actually super easy.
First of all, you have to choose the platform your website is built on.
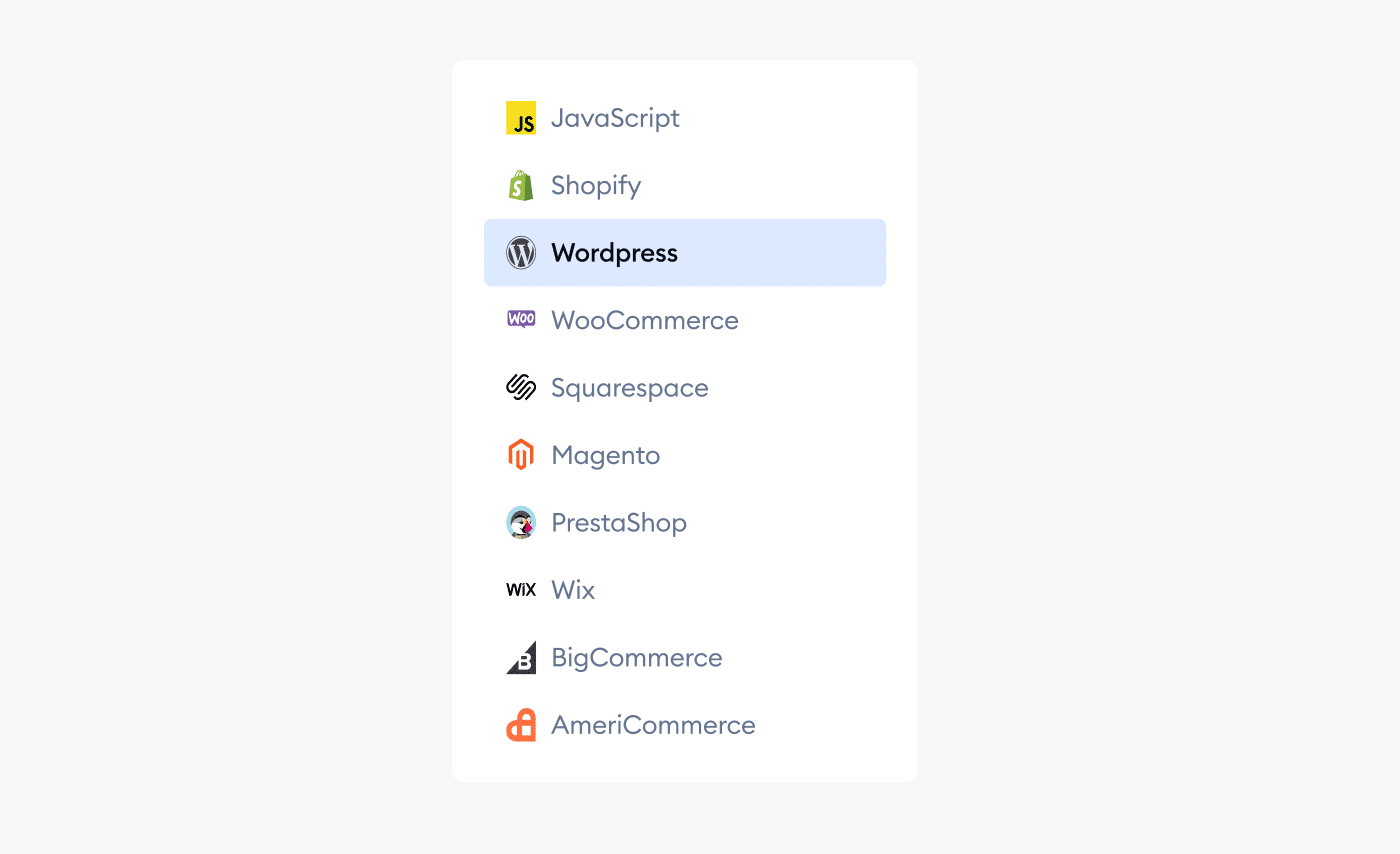
Once you choose the platform, you’ll see the installation guidelines and the code snippet. For example, if you pick WordPress, you’ll see these five simple steps:
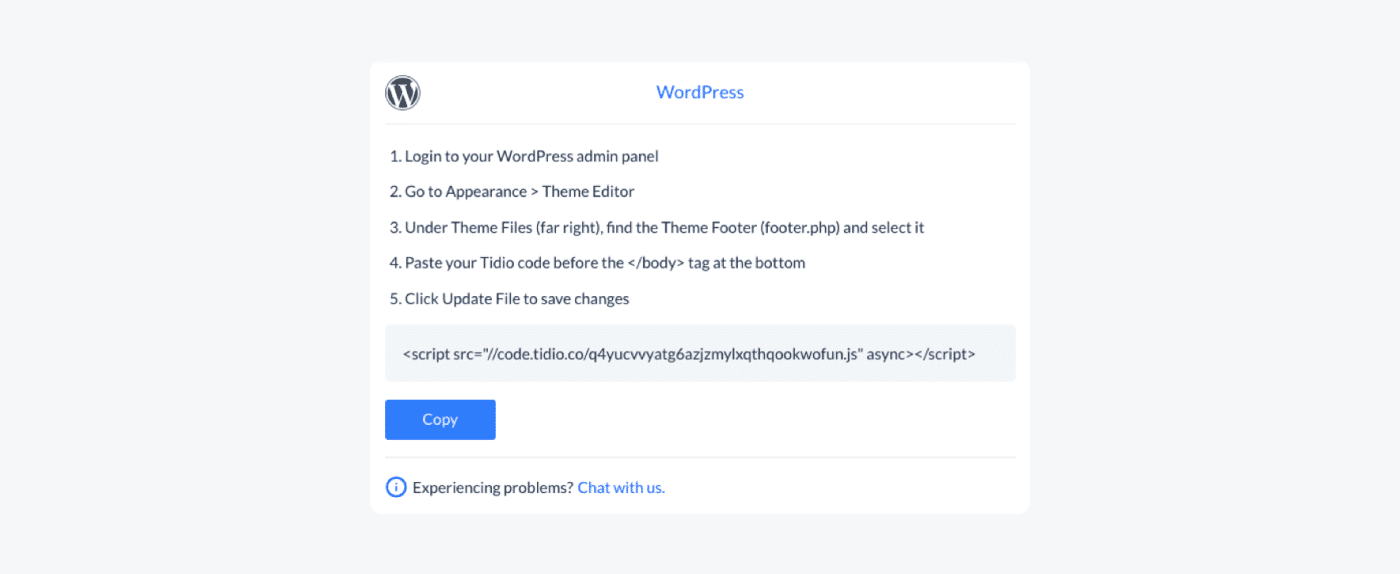
To install a live chat button on your WordPress website, just follow the instructions on the screen. It’s very simple, just find the Theme Footer, and paste the live chat button code at the right place.
Here’s what it looks like in WordPress CRM:
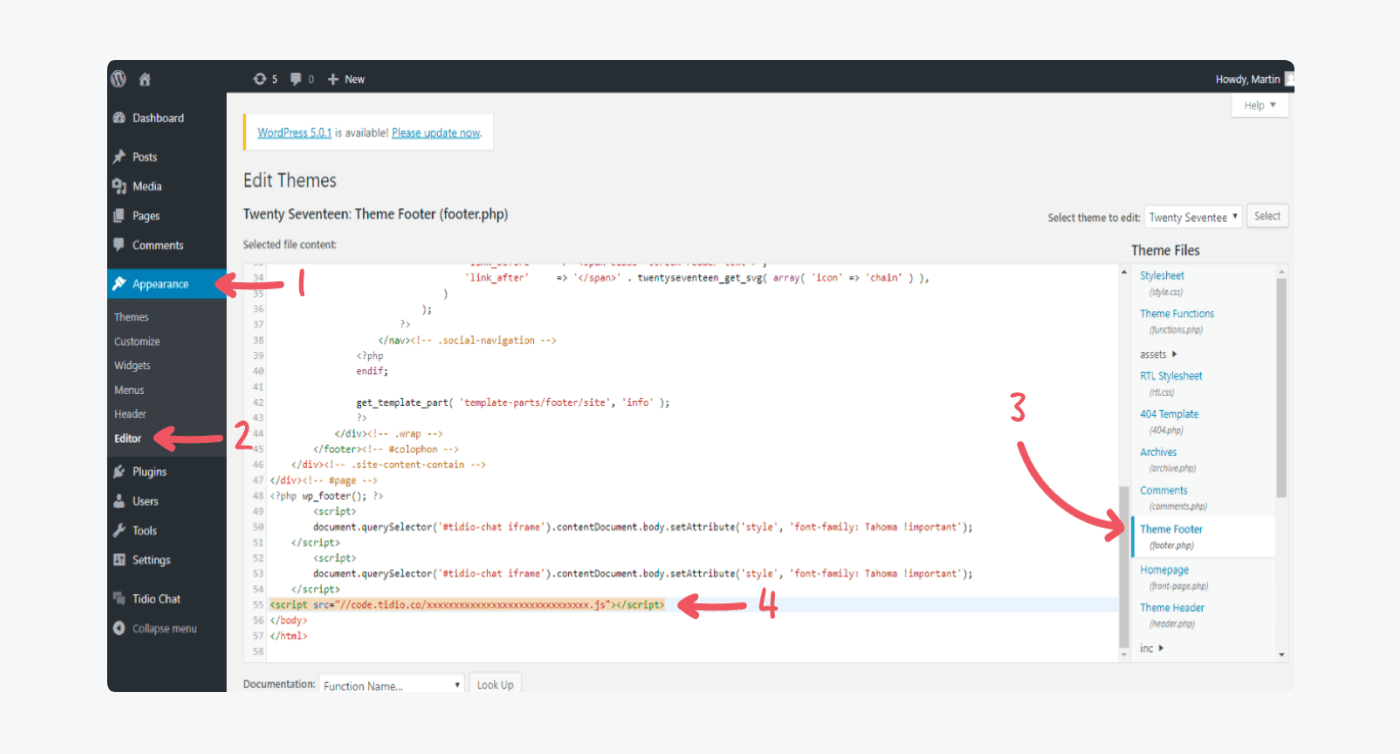
And that’s it. From now on, every visitor on your website can contact you via live chat button and ask for assistance or support.
By the way, Tidio is more than just a simple live chat button. For example, it will show you a real-time list of visitors on your site, so you can offer proactive chat support.
If you need more help with adding a live chat button to your website, refer to our detailed guides for help:
- How to create a live chat button on Shopify site
- How to install Tidio on Woocommerce
- How to install Tidio on WIX
- Tidio Live Chat Button for Magento: Installation Guide
- How to Add Tidio Live Chat to Weebly
Provide great customer service with a live chat plugin!
How to customize a live chat button?
It’s important to design your chat widget in line with your brandbook to maintain the consistency of your website and show that you’re paying attention to even the tiniest details.
Here’s what to pay attention to—
Live chat widget position
You can place the live chat button either in the lower-right or left corner of your website. If you have another widget on your website, just place the chat button in a free space to avoid mess.

The best way to choose the side for your live chat button is to simply check what aligns better with your site.
Color/theming
Another important detail is to keep your chat window and button in line with your brand colors. It’s a small brick that helps you build better customer experience.
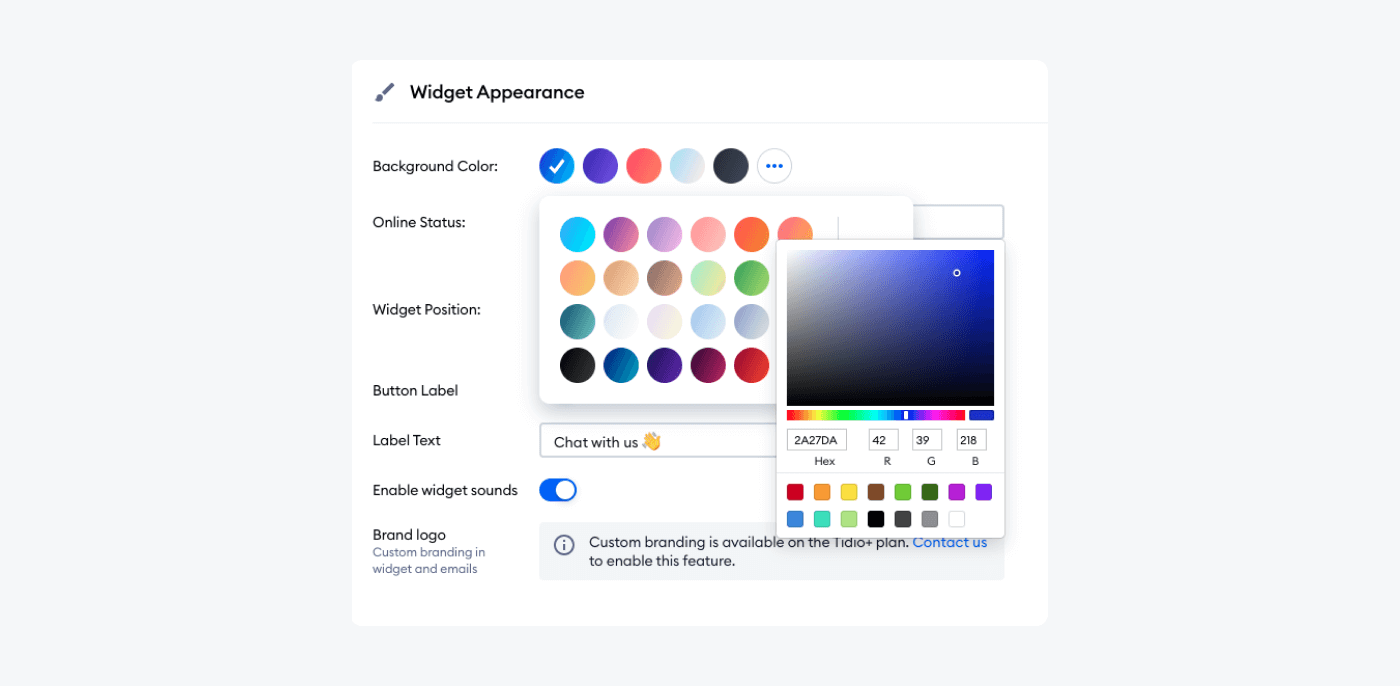
In the customization settings, you can choose the color that will perfectly fit your website design. You can choose from the predefined ones or include your own color with the RGB model.
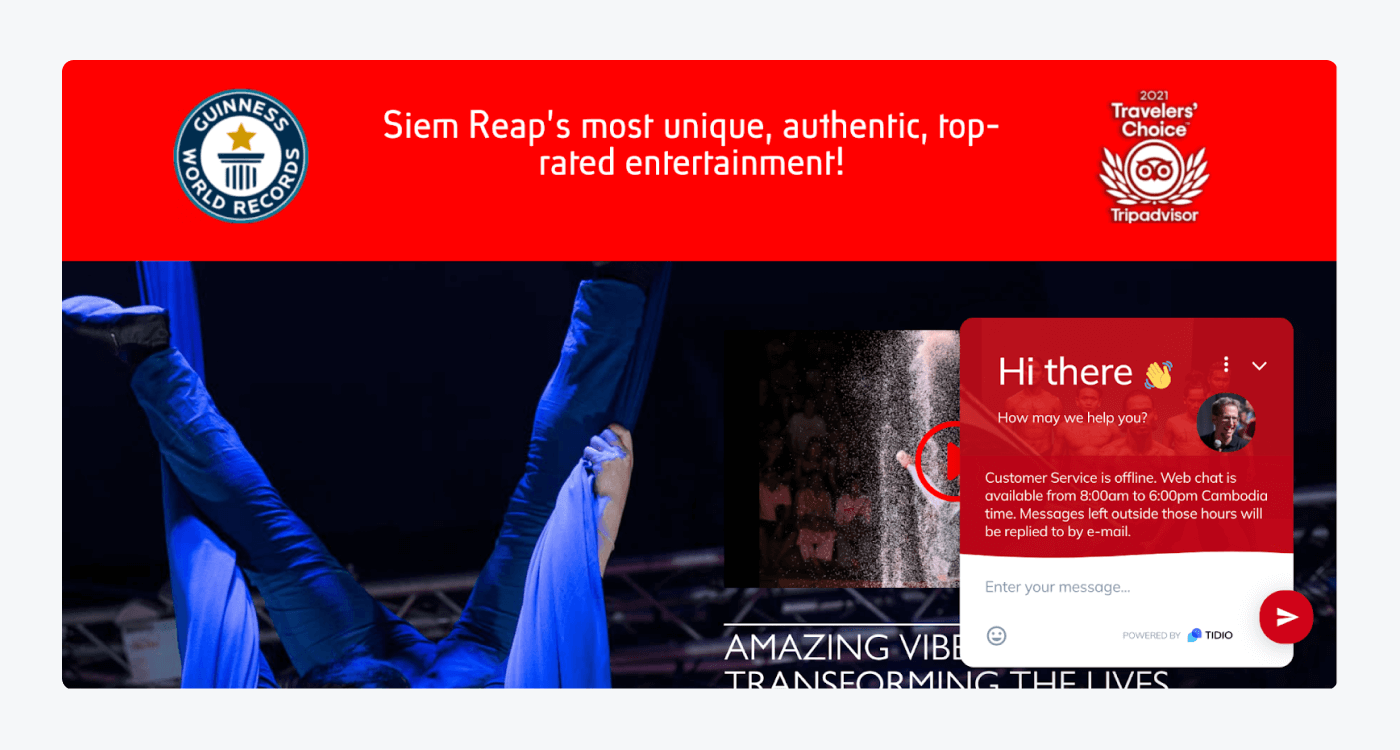
As an example, take a look at how one of our clients, Phare Circus, customized the color of the widget to match their website outline. Everything here is consistent, looks clean, and grabs the attention of visitors.
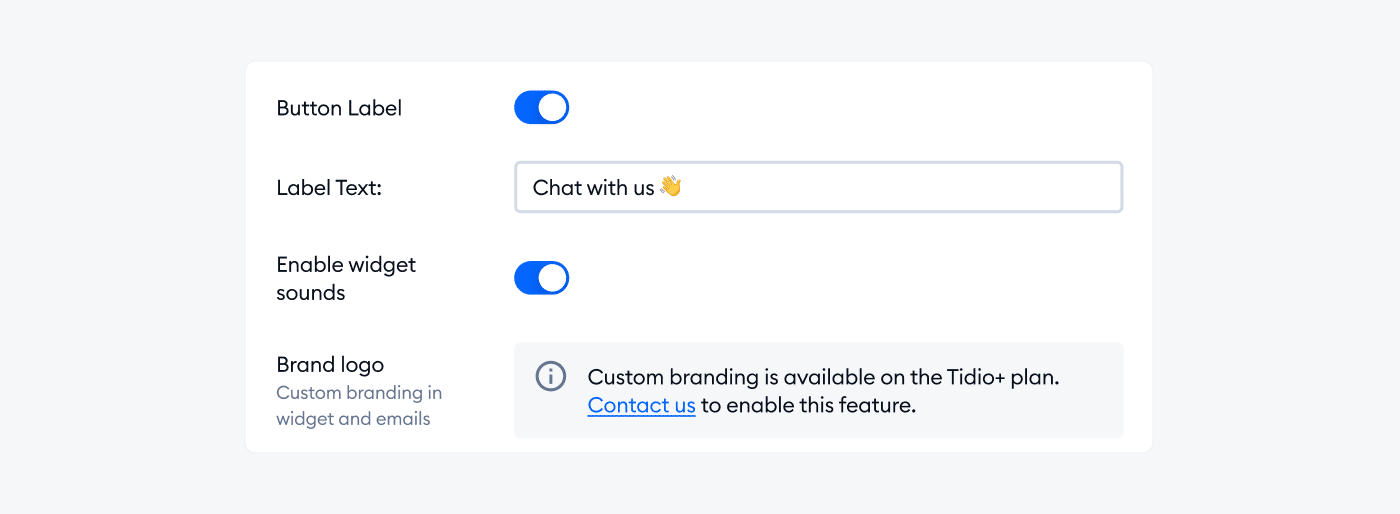
Button label and text
Button label is a small window with the “Hello” message encouraging your website visitors to start chatting with the support team via live chat. It can be, for example, “Chat with us”, “How can we help you”, or any other message that matches your brand voice.
You can freely edit the text inside the label, as well as enable or disable it on your site. If you decide to use the button label, be sure to write a short message showing that you are always eager to talk.
Languages
If you’re running an international company, sell your products or services in different countries, or just receive customers’ requests in different languages—
Then, making a multilingual live chat is the best way to go.
So, find the Multilanguage section in your settings. That’s where you set language preferences for your live chat button. If the language you’re looking for is not pre-translated, or you want to customize each phrase individually, go with the Click here button below the drop-down list.
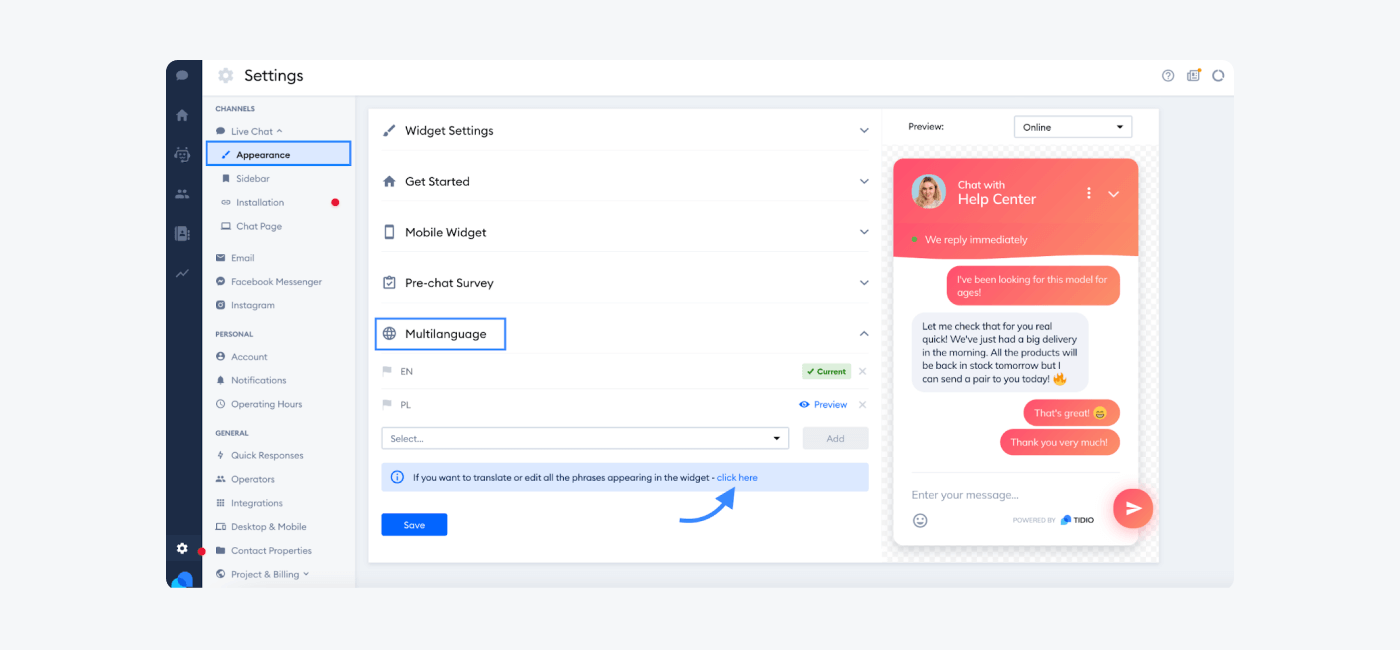
Please note that this option doesn’t translate the conversations automatically. Our tool is only able to translate the chat widget, its text, and buttons.
And remember that customization is not only about the visual side of your live chat widget. In the customization process, you can also:
- Manage the visibility of your widget
- Edit the welcome message
- Set up a pre-chat survey
- Make your chat widget open right when someone visits your website
Read more: If you want to dig deeper into the topic, be sure to check out our guidelines for Tidio’s widget customization.
Installing live chat button on your website: summary
A live chat button is a great way to create a connection between you and your customers. Thanks to that small widget, visitors can start a conversation with your brand in just one click and ask you anything related to your business straight away.
This direct way of communication with your clients will help you optimize your customer service strategy, improve support, and better understand your shoppers, just to name a few.
So, the sooner you start using a live chat widget on your website, the better for your business!
Install live chat button in seconds

